

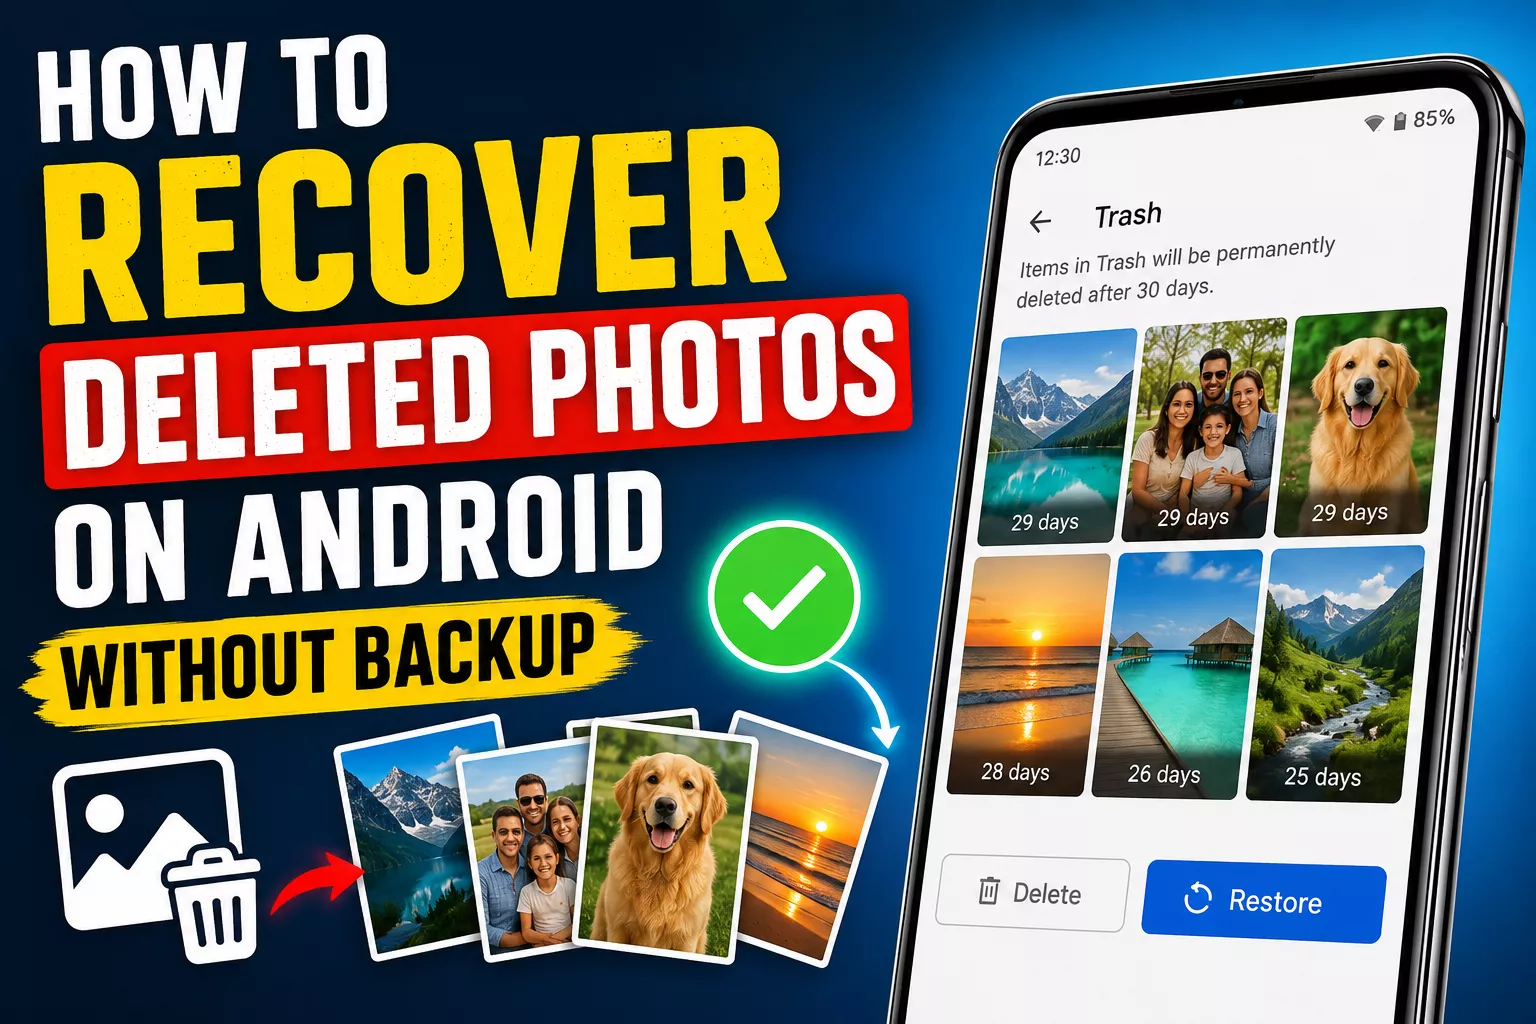
Deleting photos by accident without a backup is a stressful moment, especially when the files can’t be recreated. If you’re in that situation right now, there’s good news: recovery is often possible, even without a backup, depending on where the photos were stored and how much time has passed.
This guide isn’t going to promise a magic app that brings back every photo like nothing happened. It covers 8 separate recovery methods, in the order that generally gives you the best odds of success, for Samsung, Pixel, OnePlus, Xiaomi, OPPO, Vivo, Realme, and Motorola devices. It’s also upfront about what’s realistically possible and what isn’t, no matter which app you download.
Why Android Photo Recovery Is Harder Than You Think
Before covering the fixes, it helps to understand one concept once you get it, you’ll know exactly why some recovery methods work and others are a complete waste of time.
Older computers used to store deleted files in a way where the actual data stayed on the hard drive even after you hit delete only the “address” pointing to that file got erased. That’s why old-school recovery software could dig through your hard drive and piece files back together.
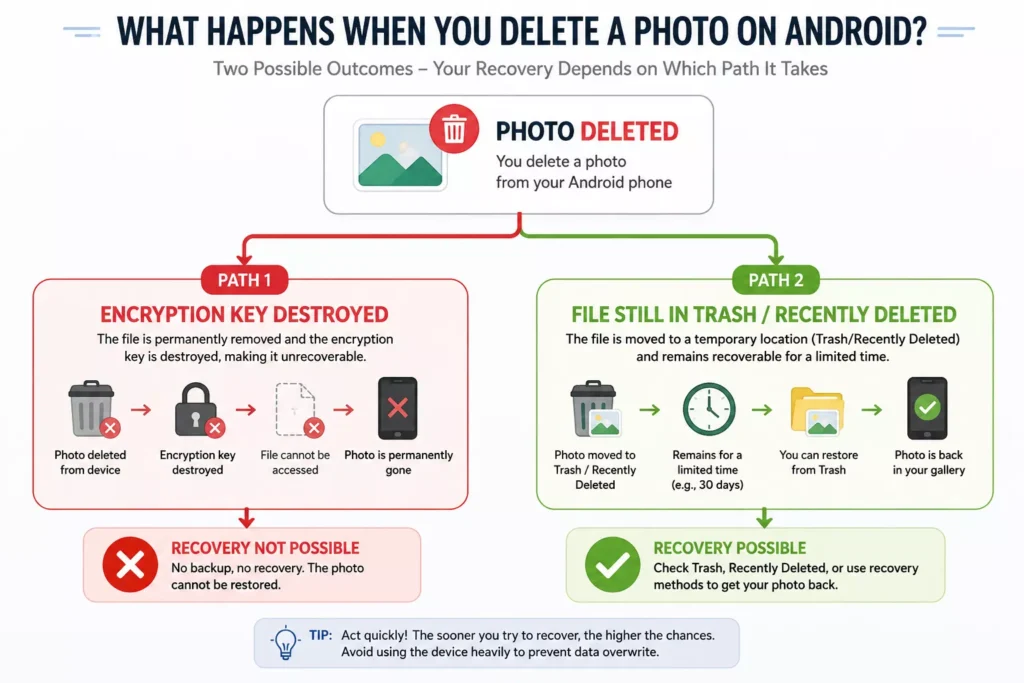
Modern Android phones don’t work that way anymore. Since Android 7.0, Google moved to something called File-Based Encryption (FBE), where every file on your phone is locked with its own unique encryption key, managed deep inside your phone’s hardware, often via a dedicated secure hardware component Google’s Titan M chip on Pixel devices, or an equivalent secure element/Trusted Execution Environment on other brands. When you delete a photo, Android doesn’t just forget where it is it actively destroys the encryption key tied to that file. Once that key is gone, the leftover data on your phone’s storage chip turns into meaningless scrambled noise. Even a forensic expert with specialized lab equipment can’t decrypt it without that key.
On top of that, your phone’s storage runs a background process called TRIM, which periodically wipes out storage blocks that are no longer needed so your phone stays fast. Once TRIM does its job, that physical data is gone for good.
So when I tell you recovery is “possible in some cases,” I genuinely mean it it depends heavily on timing, where the photo was stored, and whether the photo (or a copy of it) exists somewhere other than your phone’s internal storage. That’s exactly why I’ve split this guide into separate methods below instead of one generic “try this app” fix. Start from Method 1 and work your way down; most people find their photos in the first two or three steps.
Check Your Phone’s Gallery Trash / Recently Deleted Folder
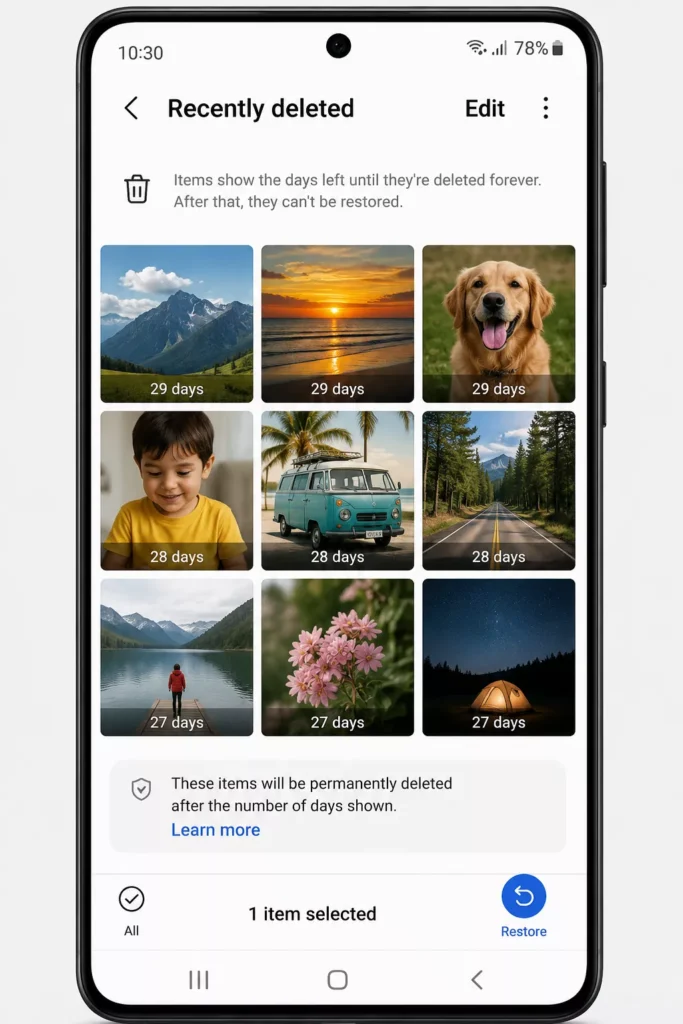
This is separate from Google Photos, and it’s easy to confuse the two. Most Android phones Samsung, Xiaomi, OPPO, Vivo, Realme, and OnePlus have their own built-in trash bin inside the stock Gallery app itself, independent of any Google account.
Here’s how to check it depending on the brand:
- Samsung: Open Gallery, tap the three-line menu, and look for Trash (or Recycle Bin). Samsung’s official support documentation confirms deleted items stay here for 30 days before being wiped automatically. Just note: if you’d previously turned the recycle bin off in Gallery settings, deletions are instant and permanent, with no safety net at all.
- Xiaomi (HyperOS/MIUI): Open Gallery, go to Albums, and swipe down to find Recently Deleted Items. Newer HyperOS devices generally hold items for up to 60 days if you’ve got cloud sync switched on; older MIUI phones default to 30 days for local-only files.
- OPPO (ColorOS), Vivo, Realme, and OnePlus: The process is nearly identical open Gallery, check Albums or the menu for Recently Deleted or Trash, and restore from there. ColorOS devices typically keep files for 30 days before the trash empties on its own.
If your photo shows up here, tap Restore, and it goes right back to your camera roll at full resolution. It’s worth checking this before trying any third-party recovery app, since the fix is sometimes already available in the gallery’s own trash folder.
Check the Google Photos Trash
This is the step almost everyone skips in their panic, and it’s honestly the one that saves the day for most people. If you use Google Photos as your gallery app which is the default on Pixel phones and installed on almost every Android device your deleted photos don’t vanish immediately.
Here’s how it actually works, straight from Google’s own support documentation: if a photo was backed up to your Google account before you deleted it, it sits in the Google Photos trash for 60 days before it’s gone for good. If it wasn’t backed up, you only get 30 days. That distinction trips a lot of people up, so it’s worth checking sooner rather than later.
To check it:
- Open the Google Photos app.
- Tap your profile icon (or the Library tab, depending on your app version).
- Look for Trash (sometimes labelled Bin).
- Find your photo, tap and hold it, then tap Restore.
Restored photos go right back into your gallery at full resolution no quality loss, no fuss. One thing worth knowing: if you get a “Delete permanently” prompt instead of the normal delete option, that usually means your trash is already full and Google is asking you to empty it first, so read that prompt carefully before tapping anything.
Try DiskDigger or a Similar Non-Root Photo Recovery App
If the trash folder is empty or the 30/60-day window has already passed, don’t lose hope yet. This is where a dedicated photo recovery app comes in, and it’s worth setting realistic expectations here.
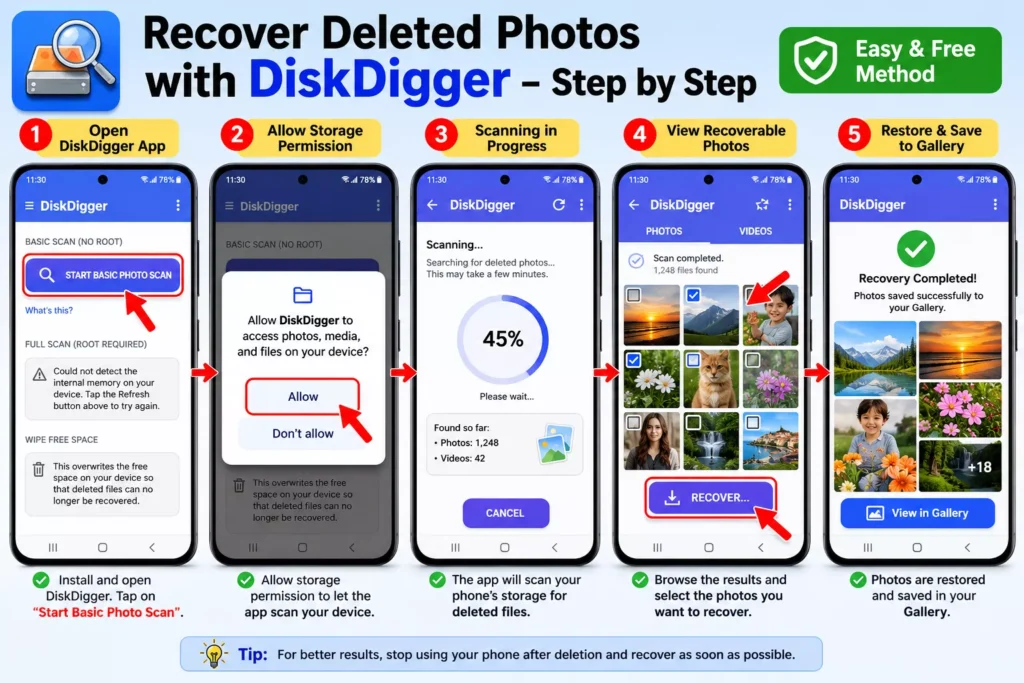
DiskDigger is a non-root photo recovery app available on the Google Play Store. On a non-rooted phone, it cannot pull back your original full-resolution photo the way it existed before deletion. What it can do is scan hidden system folders where Android stores small preview versions of your images called thumbnails that your phone generates so your gallery loads faster when you scroll through it.
Here’s how to use it, step by step:
First, put your phone into Airplane Mode immediately. This stops background apps and system processes from writing new data over the storage space where your deleted photo remnants might still exist. Every new photo, app update, or download increases the risk of permanently overwriting what’s left.
Next, download DiskDigger photo recovery from the Google Play Store. Avoid installing anything else heavy on your phone during this process the less new data written to storage, the better your odds.
Open the app and grant it “Access All Files” permission when it asks. Without this, it can’t scan the folders where thumbnails live.
Tap “Start Basic Photo Scan.” This scans accessible areas like /DCIM/.thumbnails/ and cached app databases without needing root access.
Once the scan finishes, you’ll see a grid of recovered images sort through them by size or date to spot your actual photos among system icons and random web images.
Select what you want and export it somewhere safe email it to yourself, upload to a cloud drive, or save to a different folder. Don’t save recovered files straight back into your camera roll folder until you’re done recovering everything, just to avoid any mix-ups.
The recovered images from this basic method are usually lower resolution than your originals since they’re thumbnails, not the full files. But when it’s a memory you thought was gone forever, even a smaller version feels like a win. This basic scan approach is designed specifically to search accessible cache areas on non-rooted devices, without requiring deeper system access.
Check Google Drive (Yes, Drive Backs Up Photos Too)
This one gets overlooked constantly. A lot of people assume Google Photos and Google Drive are completely separate, but if you ever had “Back up photos to Drive” switched on in an older Android version, or if you manually uploaded photos to a Drive folder at some point, there’s a real chance a copy is sitting there untouched by whatever happened in your Gallery app.
To check:
- Open the Google Drive app.
- Tap the menu icon in the top-left corner.
- Go to Trash (or Bin) to see anything recently deleted from Drive itself items here are automatically wiped after 30 days.
- Separately, search Drive for image files or check any folder you may have used for photo backups in the past.
Make sure you’re on Wi-Fi before you start scrolling through months of backup data, since checking and restoring can eat into your mobile data fast if you’ve forgotten your saved network’s password, there’s a separate guide on finding your saved Wi-Fi password on Android that walks through it.
Check Your Phone Manufacturer’s Cloud Backup
Beyond Google, most Android manufacturers run their own cloud backup service, and this is one of the most commonly forgotten options because it usually gets set up once during initial phone setup and never thought about again.
- Samsung Cloud: Go to Settings > Accounts and backup > Samsung Cloud. On many newer One UI versions, Samsung has actually shifted Gallery photo syncing over to Microsoft OneDrive instead, so it’s worth checking both your Samsung Cloud gallery backup and your linked OneDrive account. If photos were backed up here, Samsung Cloud’s own trash typically holds them for around 15 days.
- Xiaomi (Mi Cloud): Check Settings > Mi Account > Mi Cloud on the device, or log in at the Mi Cloud website directly. Cloud-backed items are generally recoverable for up to 60 days, sometimes longer on paid storage tiers.
- OPPO Cloud: Go to Settings > Cloud Services > OPPO Cloud and sign in with your OPPO account to check for a photo backup.
- Vivo Cloud Services / OnePlus Switch backups: Vivo and OnePlus devices have similar account-based cloud backup options tucked inside Settings > Accounts worth a quick look even if you don’t remember turning it on, since some of it gets enabled automatically during setup.
This step takes just a few minutes, and it’s easy to overlook since manufacturer cloud backup is often enabled automatically during initial phone setup.
Check the Recycle Bin in Your File Manager App
Here’s something a lot of people don’t realize: your phone’s file manager app often keeps its own recycle bin, completely separate from both the Gallery trash and any cloud trash. This matters because photos deleted through a file manager (rather than the Gallery app itself) sometimes skip the Gallery’s trash entirely.
- On Samsung, open My Files > Recycle Bin (also reachable through Settings > Device care > Storage management > Recycle bin). This holds deleted items from My Files, Gallery, and Voice Recorder for 30 days.
- On Pixel and Android One devices, the stock Files by Google app has included its own 30-day trash folder since Android 11 open the app, tap the menu, and look for Trash.
- On other brands, open whichever file manager came pre-installed, check its menu or settings for Recycle Bin or Trash, and browse from there.
While you’re already in your file manager poking around folders, it’s worth checking messaging app folders too. If you ever sent or received the photo through WhatsApp, Telegram, or Signal, a separate copy often sits untouched in that app’s own media folder for WhatsApp specifically, the path usually looks like Android/media/com.whatsapp/WhatsApp/Media/WhatsApp Images/. These scattered copies aren’t glamorous, but they cost nothing to check.
Recover Photos From an SD Card (Best Odds If This Applies to You)
Here’s some genuinely good news if your deleted photos were stored on a MicroSD card rather than your phone’s internal storage: your odds of full recovery go up dramatically. It makes complete sense once you understand why.
If your SD card was set up as Portable Storage the default on most phones it works like a regular USB drive using standard FAT32 or exFAT formatting. There’s no fancy encryption locking things down. When you delete a photo, the actual data mostly just sits there until something else overwrites it.
Here’s what’s recommended:
- Power off your phone completely first, so nothing continues writing data in the background.
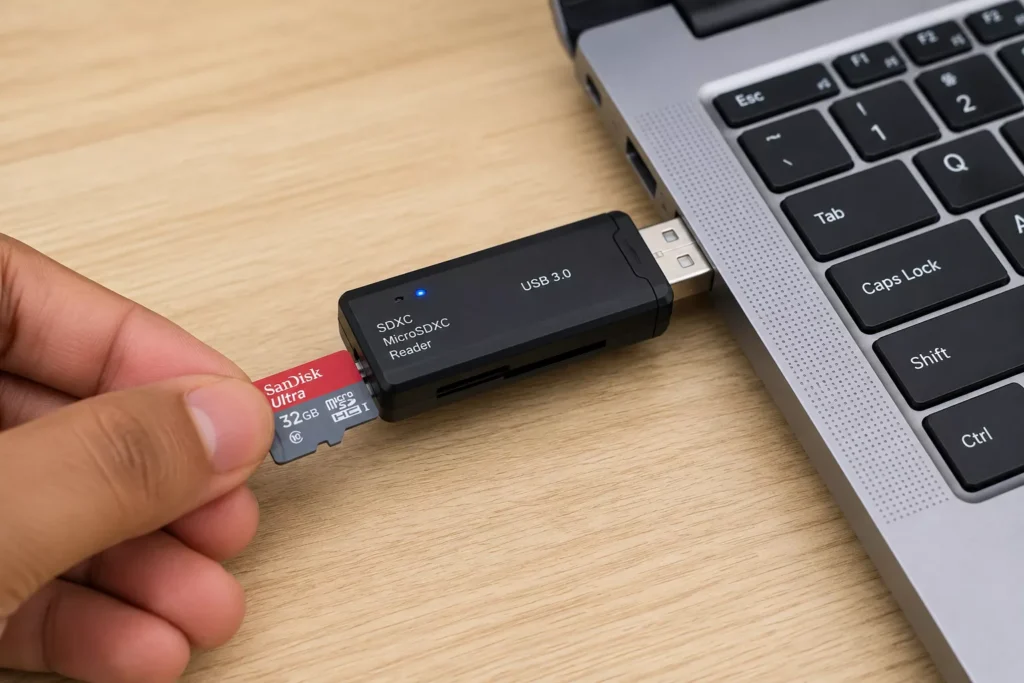
- Carefully remove the MicroSD card and plug it into a USB card reader connected to your Windows or Mac computer this bypasses the restrictive MTP connection Android normally uses and gives your computer direct, raw access to the card’s storage.
- Use a free tool like Recuva or TestDisk to run a deep scan for image file types (JPEG, PNG, HEIC). These tools look for the actual binary signatures of image files hidden in unallocated space on the card, piecing them back together even without the original folder structure.
- Save every recovered photo directly to your computer’s hard drive never back onto the same SD card, since that risks overwriting other recoverable files during the process.
One quick catch: if you had set your SD card up as Adoptable Storage (which merges it with internal phone storage), it gets encrypted just like your internal storage, and this method won’t work the same way. Most people never enable this setting though, so there’s a good chance your card is in the easier, unencrypted format.
What Happens After Permanent Deletion
Here’s exactly what happens once a photo passes the point of no return, because understanding this makes the rest of this guide make a lot more sense.
When a photo’s trash window expires or you manually empty the trash Android doesn’t just hide the file anymore. It deletes the file’s reference and destroys the unique encryption key tied to that specific file (remember the File-Based Encryption mentioned earlier). From that moment, whatever bits remain physically on the storage chip are just scrambled, unreadable noise. There’s no key left to unlock them.
Shortly after, your phone’s background TRIM process kicks in and physically wipes those now-useless storage blocks so the phone can reuse that space efficiently. Once TRIM has run its course which can happen within minutes to a few hours of normal phone use the physical data is gone, not just inaccessible.
A factory reset takes this even further. It doesn’t just delete file references one by one it triggers a full cryptographic wipe of the master encryption keys tied to your entire storage partition, all at once. Even though remnants of old data might technically still sit on the physical chip afterward, without those keys, none of it can ever be reconstructed.
When Recovery Is Unlikely (Let’s Be Honest)
It’s better to know this now than to waste hours chasing something that isn’t coming back. Based on everything above, recovery becomes very unlikely and often flatly impossible when:
- You’ve already done a factory reset. This is the big one. A factory reset destroys your storage’s master encryption keys in one go. Any app or service claiming they can recover photos after a factory reset on a modern encrypted Android phone unfortunately isn’t being fully honest with you. The only real exception is if those specific photos also existed somewhere else a messaging app, an SD card, or a cloud account.
- More than 30–60 days have passed since deletion and the photo wasn’t backed up anywhere. By this point, most trash folders have already emptied automatically, and TRIM has likely cleared the underlying storage blocks.
- The photos were on internal storage, not an SD card, and you’ve kept using the phone normally since taking new photos, installing apps, receiving updates. Every bit of new data written increases the odds of overwriting whatever fragments were left behind.
- Your SD card was set to Adoptable Storage rather than Portable Storage, meaning it’s encrypted the same way your internal storage is.
If none of the trash folders or backups above turned anything up, and the photos were on internal storage, a basic non-root photo recovery app like DiskDigger (covered above) is worth trying before accepting the loss just remember it typically recovers only lower-resolution thumbnails, not full-quality originals.
Should You Root Your Phone Just to Recover Photos?
This is a common question, and the honest advice is: don’t do it just for this reason. Rooting technically unlocks deeper access to your storage, allowing specialized tools to dig through unallocated sectors for leftover full-resolution files but only if your phone was already rooted before you deleted the photos. If your phone wasn’t already rooted, unlocking the bootloader to root it now triggers an automatic factory reset as a built-in security measure wiping your encryption keys immediately, the exact same outcome as the factory reset scenario above. You’d be destroying any remaining chance of recovery in the process of trying to gain the tools to recover it. It’s a genuine catch-22 that’s easy to fall into out of desperation.
Simple Habits to Prevent This From Happening Again
A few simple habits can prevent this stress from happening again.
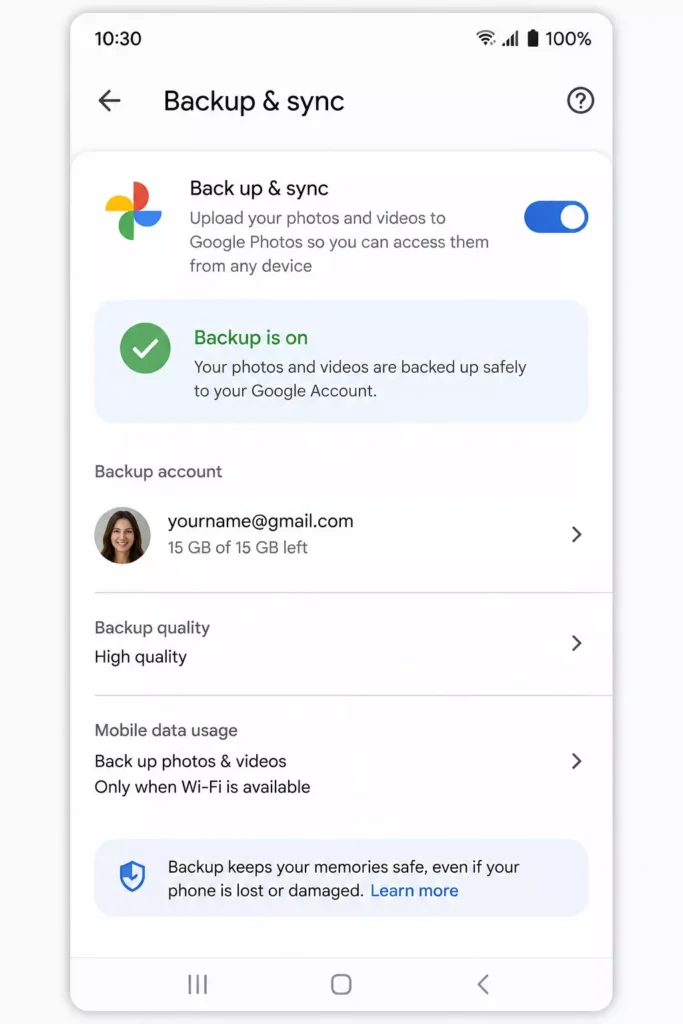
Turn on automatic backup in Google Photos, even if you only keep it on Wi-Fi to save mobile data it’s a free safety net that takes two minutes to set up and saves you from ever going through this panic again. If you use an SD card, get in the habit of periodically copying photos over to a computer or a second cloud service as an extra layer of protection.
And whatever you do, if you ever delete something important by mistake, resist the urge to keep using your phone normally. Put it in Airplane Mode, avoid taking new photos, and start your recovery attempt as soon as possible every hour of normal phone use reduces your chances. (On a related note, if your phone is stuck plugged in while you’re doing all this and won’t actually charge, that’s a separate and fixable problem covered in this guide on phones that won’t charge.)
While you’re reviewing your phone’s settings to lock down your backups, it’s also a good time to double-check a couple of other basics that tend to get ignored until something goes wrong like making sure voicemail is actually set up on your Android phone, and knowing what to do if you ever run into a SIM card not detected error, which sometimes shows up right after a reset or software update.
Final Thoughts
Losing photos without a backup is genuinely stressful, especially when they’re memories you can’t recreate. But as you’ve seen, you’re not always out of options. Start with the Google Photos trash and your Gallery’s own trash folder, then work through Drive, your manufacturer’s cloud backup, your file manager’s recycle bin, and if the photos were on an SD card a proper desktop scan, where your odds go up considerably.
There’s no guarantee of a miracle for every single case, especially after a factory reset or once TRIM has already cleared the storage blocks. But going through the right steps, in the right order, genuinely gives you the best shot at getting at least some of those photos back.
FixMyDaily Troubleshooter
Which photo recovery method should you try?
Answer 3 quick questions and get a step-by-step plan matched to your exact situation.
Question 1 of 3
Have you done a factory reset since the photos went missing?
Question 2 of 3
Where were the deleted photos stored?
Question 3 of 3
Roughly how long ago were the photos deleted?
Recovery not realistically possible
Since a factory reset was performed after the photos were deleted, the phone’s master encryption keys have already been wiped. Modern Android hardware encryption destroys access to deleted sectors permanently upon reset.
- Check if photos were sent via WhatsApp, Telegram, or email (these keep separate folders).
- Check any PC or Mac you have previously connected for file transfers.
- Visit photos.google.com to see if background sync was active.
- Turn on automated Google Photos backup to prevent future data loss.
Good news — SD card recovery has a high success rate
Photos deleted from portable MicroSD cards are not immediately destroyed by Android base encryption. A direct desktop scan can often restore original-quality images.
- Power off the phone and remove the MicroSD card immediately.
- Insert the card into a USB card reader connected to a PC or Mac.
- Scan the card with free recovery tools like Recuva or TestDisk.
- Save all recovered photos to your computer drive, never directly back to the card.
Check your gallery Trash / Bin folder first
Since it has been under 30 days, your photos are almost certainly still sitting in your phone built-in Trash or Recently Deleted folder in original quality.
- Open your Gallery app or Google Photos and tap Trash / Bin.
- Select the missing photos and tap Restore.
- If not visible in Gallery, check the online trash directly at photos.google.com/trash.
- If cleared, run a basic non-root scan with DiskDigger immediately.
Try a basic non-root photo recovery scan
The trash window has likely expired. Without root access, internal recovery cannot access deep raw flash sectors, but it can pull back cached thumbnails and preview files.
- Turn on Airplane Mode immediately to stop background apps from overwriting cache.
- Download DiskDigger Photo Recovery from the Google Play Store.
- Grant storage access and tap Start basic photo scan.
- Save recovered images to Google Drive, Dropbox, or email.